How to Increase the Accuracy of Automatic Captions

This blog was originally published in May 2017 and was updated in October 2018.
Closed captioning is the display of text on a video player to visually communicate spoken dialogue, and is extremely important for all organizations for a few key reasons:
-
The audience for closed captioning are typically individuals who are hearing impaired, so including captions on all videos is necessary for accessibility.
-
Captions can be used to display audio translations to non-native speakers, ensuring understanding of video content.
-
Viewers can more easily search in videos to jump directly to specific points of interest.
The task of adding closed captions to all video content typically falls on video producers and IT professionals, and this process raises two major challenges: It is expensive, and it is time consuming. Luckily, Ensemble Video offers an automatic caption service that allows quick, easy and affordable creation of closed captions for all video content.
However, the accuracy of automatic captions can vary based on a video’s audio quality, so it’s necessary when creating video content to record high-quality audio. In this article, we’ll provide several tips to increase the audio quality of your videos so you can increase the accuracy of automatic captions.
What causes inaccurate automatic audio captions?
Many experienced video professionals understand how difficult it can be to ensure accuracy of automatic captions, most often due to poor audio quality. For automatic closed captioning technologies to accurately transcribe the audio information, the audio must be crisp, clear and easy to understand. Often, due to some common issues, many videos don’t have the excellent audio quality necessary for accurate automatic captions. Audio problems can range from improper mic placement to issues with the surrounding recording environment.
The most common problems with audio quality in videos include:
-
Background noises and unnecessary chatter
-
Equipment sounds (fans, hums, buzzing, air conditioners, etc.)
-
Distance from the microphone
-
Poor quality microphone
-
Rooms with an echo
-
Audio feedback
-
Wind noise
How do you produce better quality audio to improve accuracy of automatic captions?
There are three key components to producing good audio to ensure accuracy of automatic captions: a quality microphone, proper placement of the microphone and an optimized recording environment.
Quality Microphone
Make sure you’re using the right microphone for the job. The latest and greatest video cameras and webcams boast the highest image quality and visual capabilities, but that is only half the battle. Many times, the built-in microphone of your camera, computer or mobile device may not be good enough. If you are using the on-board microphone and find your video content’s accuracy of automatic captions is subpar, consider investing in a quality microphone. Keep in mind that a quality microphone does not necessarily mean it is an expensive microphone. There are several quality microphones that can be purchased for less than $100 and will improve the accuracy of automatic captions.
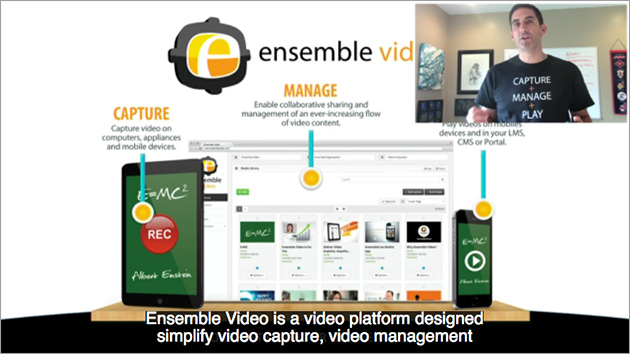
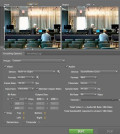
Closed Captioning Example
[bctt tweet="There are three key components to producing good audio to ensure accuracy of automatic captions: a quality microphone, proper placement of the microphone and an optimized recording environment."]
Here are a few types of microphones that you may want to consider based on the type of video you are creating:
-
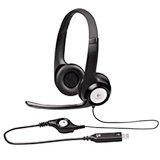
Headsets: If you are creating screencasts and eLearning or training videos, a decent USB or Bluetooth headset microphone is a valuable tool. You don’t need a studio-level mic to produce great audio quality for your screencast experience, just something better than the built-in microphone on your computer. Headsets make a huge difference; they are super easy to use and generally inexpensive.

Shotgun Mic: If you need to be able to focus on a human voice from a distance while eliminating other sounds from the side and rear, a shotgun microphone is a good option. A shotgun mic is a cylindrical, long microphone designed to give it a narrow range of focus, making it a great option for picking up voices in a recording location. You can connect a shotgun microphone into your HD video camera, an iPad/iPhone and an Android.
-
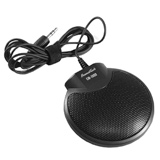
Omnidirectional Mic: If you need to record all of the voices or sounds in a room, an omnidirectional microphone is an option to consider. Omnidirectional microphones pick up sound equally from all sides or directions of the microphone. Some great use cases for an omnidirectional microphone are round table discussions and/or multi-speaker productions.
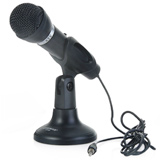
Unidirectional Mic: If you are in a scenario where only the voice of one speaker in the front of the room needs to be recorded without any noise that may come from the audience, a unidirectional microphone is a perfect fit. Unidirectional microphones are designed to focus their sound pick-up from a specific side or direction of the microphone.
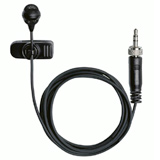
Lapel or Lavalier Mic: A lavalier (also known as a lav, lapel or lap) microphone is attached to a subject’s clothing to record audio from a single speaker. Lavalier mics are less noticeable than larger microphones, and a wireless lapel mic can give a person hands-free freedom of movement while maintaining consistent audio quality.
Placement of Microphone
The golden rule of microphone placement is to get the distance right based on the type of microphone you are using. In general, if you are trying to produce great quality audio to increase the accuracy of automatic captions, place the microphone as close as is practical to the sound source without getting so close that you introduce unwanted effects. A mic placed too close to a speaker will produce unwanted pops and booms, and may be a nuisance for the speaker. A mic placed too far away will produce audio that is undesirably quiet.

Try to achieve a good balance between the subject’s voice and the ambient noise. For example, if you are recording an interview or presentation with a lavalier microphone, you will need to place the microphone about 6 inches from the subject’s mouth and ensure very little ambient noise. If you are recording a speech in a hall using a unidirectional microphone, you will want to make sure the voice side of the microphone is close to the speaker to guarantee a quality audio recording without picking up the surrounding noise from the audience, air conditions, projectors, or anything else. Ideally, the unidirectional microphone should be within a few feet of the speaker, and you certainly don’t want to place it outside the range of the microphone, which is commonly around 15 feet.
But don’t be misled — closer is not always better. It is possible to get too close. Here are some examples:
-
If a lavalier microphone is too close to the speaker’s mouth, the audio may be unnaturally boomy, and you are also likely to experience popping and other unpleasant noises.
-
A unidirectional microphone that is too close to loud sound sources is likely to create distorted or “hot” audio. Have you ever seen a guest speaker “eat the mic” and hear the effects from that? You’ll likely get loud feedback in an amplified environment, and this can harm the accuracy of automatic captions.
-
Placing a mic too close to moving parts, rustling papers or mechanical sounds (projectors, computer fans, or air conditioners) may produce negative results. For example, if you place an omnidirectional microphone next to an air conditioner you run the risk of getting too much air and not enough voice.
The Recording Environment
In an ideal world, you have a recording studio where you can control all the sound which will translate to perfect accuracy of automatic captions. But since you likely don’t work for a movie production company or have access to a quality recording studio, you should find other ways to optimize the recording environment.
Optimizing the environment means eliminating all potential background noise and potentially making some modifications to soften the room. For example, avoid recording video and audio places that have loud HVAC systems, are near dinging elevators or microwaves, have barking dogs or audible street noises, or are very reverberant. Rooms that don’t have carpeting or anything on the walls are likely to have significant echoing. If you want to try and soften a reverberant room, bring in things like couch cushions, moving blankets, or sound absorption panels.
The more you control the recording equipment and environment, the better audio you can produce, which will increase the accuracy of automatic captions. You do not have to be a millionaire or an expert to have perfect sound quality in your videos. Just choose the right microphone for the recording, place it properly and record in an appropriate location.
Don’t forget, after your automatic captions are created, you can edit them in the integrated Amara Caption Editor to make all your content accessible and searchable with Ensemble Video’s in-video search feature.
You can get started captioning your video content for $0.05/min or less.


You must be logged in to post a comment Login